Step 2
Install wireless switch with four buttons
A
Slide the button battery, with the positive side (+) facing upwards, into the notch on the back of the switch.
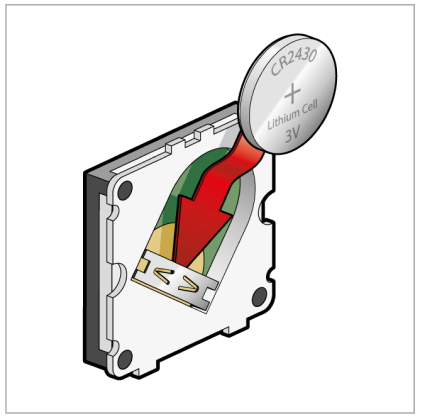
Tip: When replacing the battery, use Renata 3V/270mAh CR2430, Saft 3V/270mAh LM2430, Varta 3V/260mAh CR2430 or Panasonic 3V/250mAh CR2330.
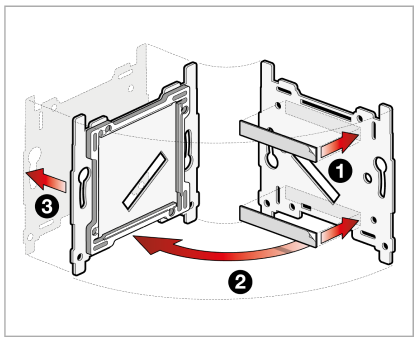
B
Decide where you will place the wireless switch. Clean the surface, removing all dust and grease.
Note: In order to ensure good operation, avoid placing the wireless switch near a metal construction or close to the ground.
Stick the double-sided tape provided to the back of the plastic base ❶ and stick the base ❷ to a flat surface ❸ (for example, to glass, paintwork, wood or tiles).
OR
Screw the plastic base into the wall tightly (for example in brick walls or plaster work).

Note: You can use the base to extend an existing switch. Than you stick the wireless switch beside it and finish it off with a double horizontal or vertical central plate with centre-to-centre distance 71 mm. You can also use the base to replace an existing switch in a flush-mounting box for screw fixing, in which case you should place the screws horizontally.
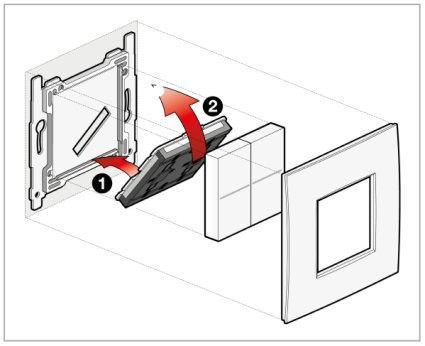
C
Slide the switch into the bottom of the base ❶ then click thetop tight ❷. Next, install the finishing set and the central plate (bought separately).