Step 2
Finish installation
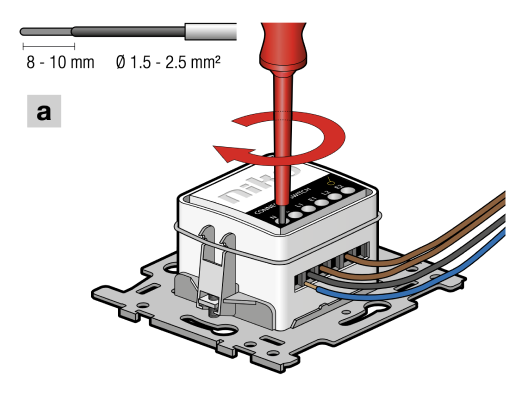
A
Connect the wires as shown in the wiring diagram on the previous page.
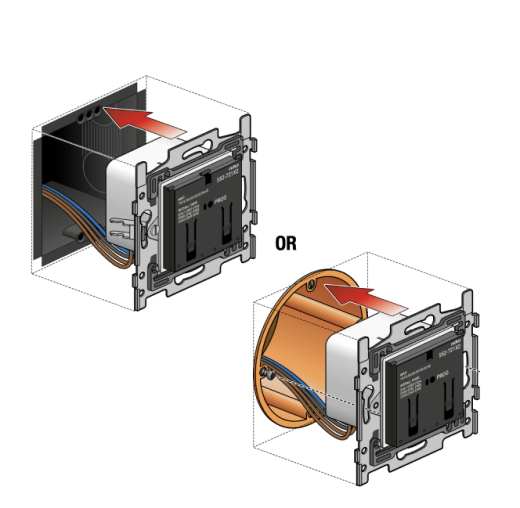
B
Attach the motor control in the wall. When attaching in a hollow partition, you must remove the claws and attach the motor control in the right position with screws.
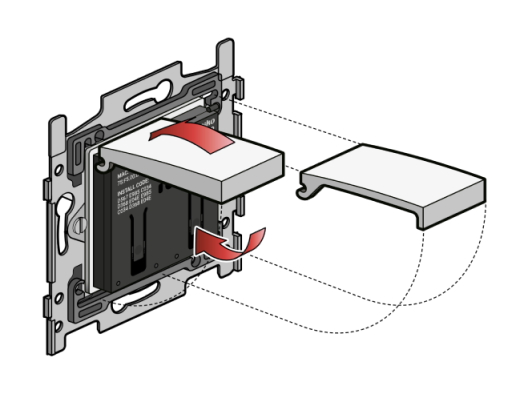
C
Place the finishing set (bought separately) on the motor control.
D
Install the central plate (bought separately).
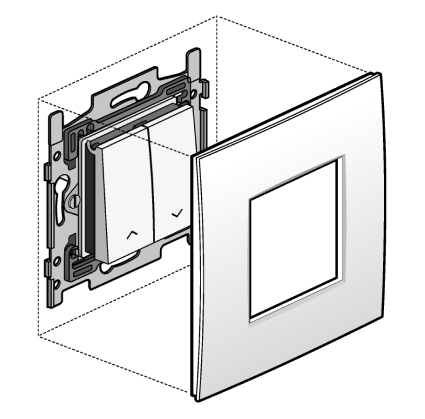
E
Click the central plate tight on to the motor control.

Repeat steps 1 and 2 for each switching that you wish to make smart using a connected motor control.