Step 4
Download and install the Niko Home app
Skip, app is already installed
A
Download the Niko Home app via Google Play or in the App Store.

B
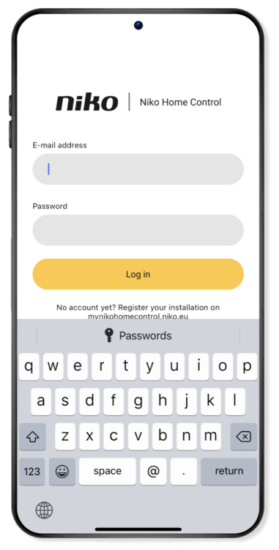
Open the Niko Home app and log in with the same e-mail address that you used to register the wireless smart hub on https://mynikohomecontrol.niko.eu .
Tip: You can make optimal use of the Niko Home Control installation if you allow the app access to your location, use of mobile data and to send notifications.
C
If a new software version is available for the smart hub the app will ask to perform the upgrade before you continue.
This upgrade can take up to 20 minutes.
If you choose to perform the upgrade later on, you can continue to command the installation, but will not be able to program.


Add the connected single switch(es)
Note: If you have installed several switches, dimmers or socket outlets, you must add the devices in the right order in order to create an optimum network. Start with the device closest to the wireless smart hub and continue until you have added the furthest device. Also, check the explanation about the Zigbee® mesh network.
A
Navigate using the menu (≡) to Settings and click on Devices.


B
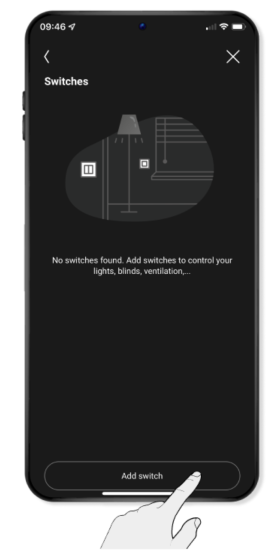
Select Switches from the list of devices that you can add.


C
Click on Add switch.
D
Confirm in which room the switch is located.


Choose an existing room or add a new one.
E
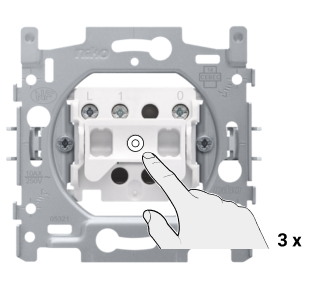
Press the control button of the switch quickly 3 times in a row in order to send a signal to the Niko Home app, allowing you to add a switch.
-
You are required to add the switches manually one by one. This may seem like hard work, but then you know exactly which switch you are adding and you can allocate an appropriate name in the app.
Always start with the connected single switch. You can add any traditional push buttons later.
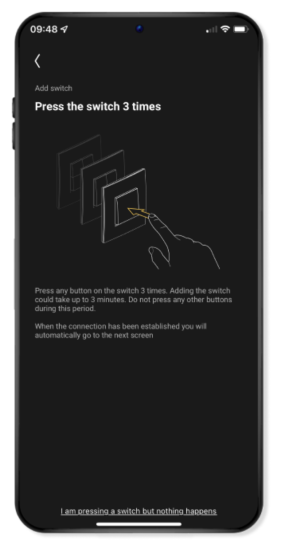
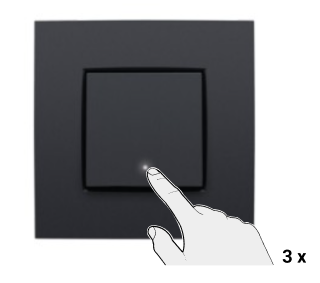
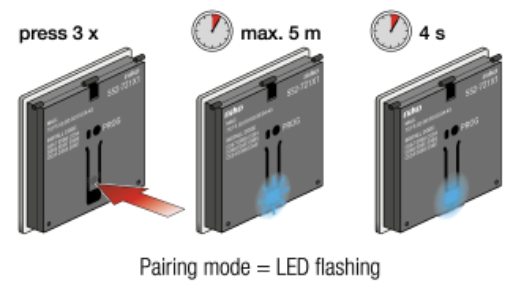
After pressing the control button 3 times the blue LEDs on the switch will flash. This can take 3 minutes. Once the connection has been established the blue LEDs on the switch will light up continuously for 4 seconds. You then go automatically to the next screen in the app.
F
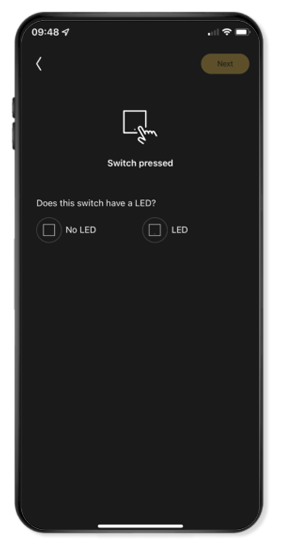
Set the behaviour of the LED for this switch.
- Tick LED if you want feedback whenever this switch is turned on. The LED acts as an informant: the white LED lights up when the associated lamp is on. To do this you need a finishing set with a lens. Then click on Continue.
- Or tick No LED if you don't want the LED to light up when turned on. Then click on Continue.
Tip: You can always alter the LED behaviour later on.
The switch and accompanying lights have now been added.
G
Give each lamp and switch a clear and appropriate name that you can easily find again later.


Tip: You can name the lamps and switches after their location, for example: ‘Lamp above the lounge area’ or ‘Switch in the living room’.
H
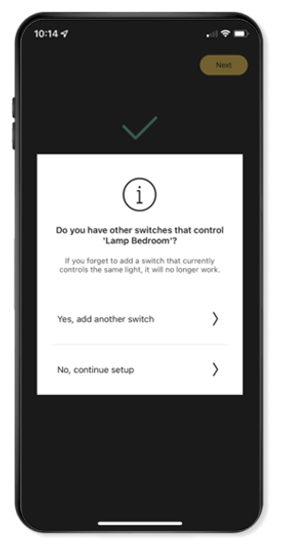
If more than one switch commands this lamp, you can also add the remaining switches (these are the traditional push buttons).
Note: You can also make a setting to command this lamp with a switch that is not physically connected to the lamp. You can program this at a later stage.
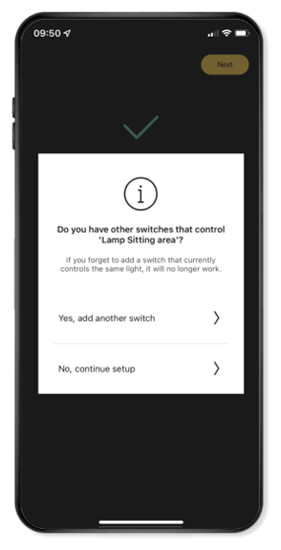
Once you have added the last switch, click on No, continue with the setup.
If you wish to add another switch, click on Yes, add another switch .
a
Add the traditional push button(s) and connect them with the Niko Home Control installation in the same way as the connected single switch.


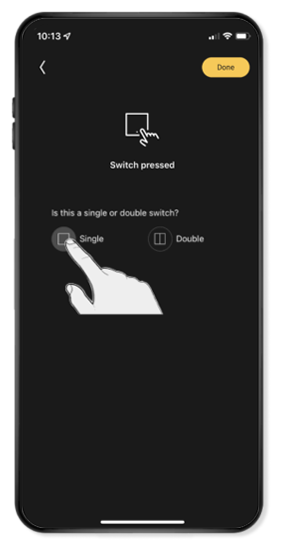
b
Confirm whether this is a push button with one of two buttons .
c
Then you can also give these switch(es) an appropriate name.


d
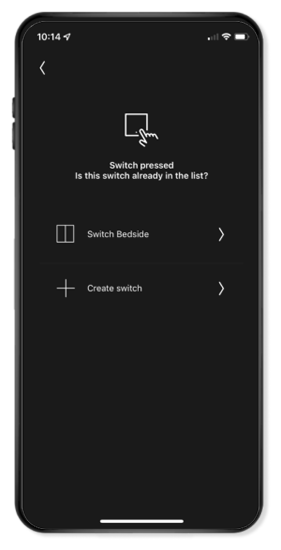
You will be asked again if you are using other switches in the current setup.
You can add each traditional push button individually in a switching and allocate a name, but these cannot be programmed individually later on.
If you want to add a new switch, the app starts by asking whether this switch is already on the list. Click on Create switch.
I
Click on Ready once you have added all switches for this light point. Your settings are then sent to the wireless smart hub.


This may take a few minutes. During this step your Niko Home Control installation may react more slowly than you are used to.
J
In the navigation tab Command all lamps now appear. You can command one light point using the app by clicking on it in this screen.


Repeat the steps to add connected switches and traditional push buttons for all other light points that you have made smart.